


Are you getting ready for an exterior painting project on your home in Kirkland? Before we open a can of paint or even tape off a single window, let us let you in on a secret that many homeowners overlook: prep work is everything. A well-prepped house means better paint adhesion, longer-lasting results, and less stress during the process.
In this complete guide, we’ll walk you through what you need to do before that first brushstroke hits your home’s siding—from cleaning and repairs to priming and protection.
Whether you’re hiring a professional exterior painter or tackling a DIY project, this checklist will make your exterior house painting experience smoother and more successful.
Why Prep Work Matters for Exterior Painting
You wouldn’t build a house on a weak foundation, right? The same logic applies to painting your home. If you skip the prep, your paint job could peel, bubble, or fade in just a few months—especially with Kirkland’s rainy seasons and coastal air.
Benefits of thorough prep work:
- Increases paint lifespan by years
- Prevents flaking, chipping, or blistering
- Saves you money by reducing the need for touch-ups
- Enhances curb appeal with a professional, polished finish
Whether your house has vinyl siding, wood siding, or even aluminum, proper maintenance and surface prep ensures your investment lasts.
1. Clean First, Always: The Foundation of a Smooth Paint Job
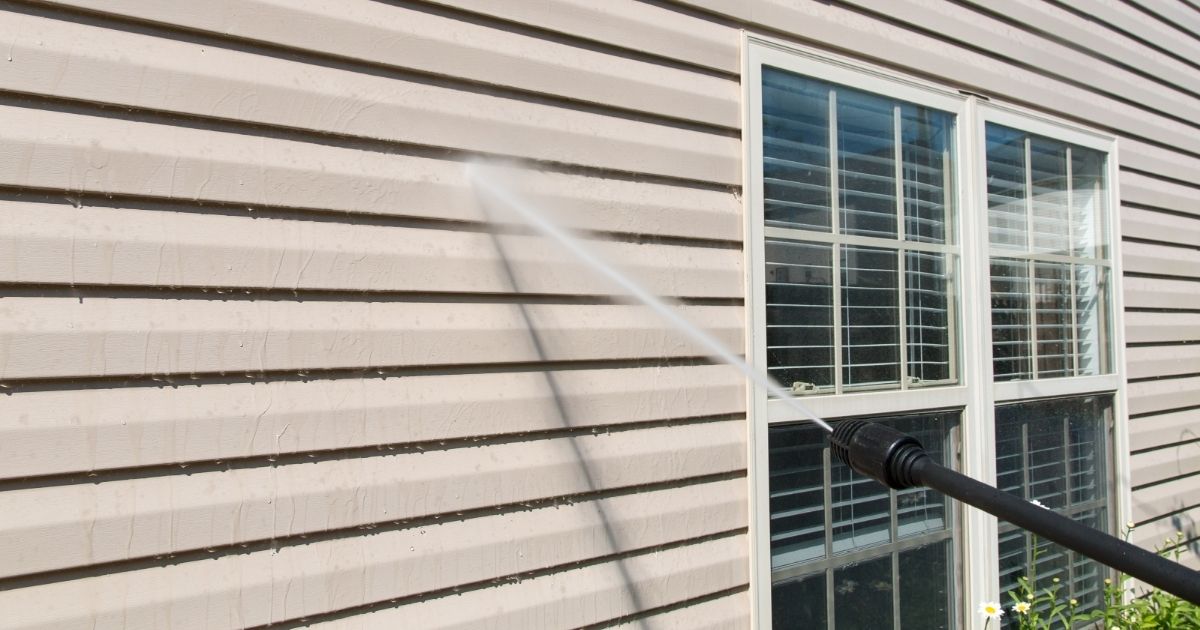
One of the most common causes of peeling paint? Painting over dirt, mildew, and chalky residue. You need a clean, dry surface before anything else.
How to clean your home's exterior:
- Pressure wash: This is the fastest and most thorough method for removing grime, loose paint, and mildew. Use low to medium pressure for vinyl siding and higher pressure for brick or concrete.
- Alternative: No pressure washer? Use a scrub brush, mild detergent, and a garden hose. This takes more elbow grease but works just as well.
- Let it dry completely: Moisture trapped beneath paint can lead to bubbles and mold. Wait 24–48 hours before moving to the next step.
💡 Pro tip: Don’t forget to clean under eaves, behind shutters, and around the base of your home—these areas collect the most gunk.
2. Repairs & Prep: What You Must Fix Before Picking Up a Brush
Now that your surface is clean, it’s time to inspect for damage. Ignoring small problems now can turn into big expenses later.
What to look for:
- Rotted wood around windows, fascia, or trim
- Cracks and holes in siding or stucco
- Loose paint or flaking areas
- Signs of rust, especially near metal fixtures
How to fix them:
- Replace damaged boards: Especially with wood siding, always replace rotted sections.
- Fill gaps and cracks: Use exterior-grade caulk or filler to seal joints and prevent water damage.
- Sand and feather edges: Smooth out transitions between bare wood and old paint to avoid visible ridges.
3. Prime Time: Don’t Skip the Primer
If you’re dealing with bare wood, patched areas, or any repairs, primer is essential. It helps the new paint bond properly and gives you a smooth, even finish.
What to know about primer:
- Use a high-quality exterior primer—latex for most homes, or oil-based for knotty or old wood.
- Only prime areas that need it: bare spots, new repairs, or stained areas.
- Let it dry fully before applying the topcoat (usually 24 hours depending on weather).
Skipping primer often leads to lap marks, uneven coverage, or worse—more coats of paint to achieve proper coverage.
4. Cover and Protect: Smart Setup Before Painting Begins
Before you grab a roller, take a few extra minutes to protect your surroundings. This step prevents accidental splatters on things you don’t want painted—like your rose bushes or your AC unit.
Must-do prep steps:
- Cover landscaping: Use breathable drop cloths over plants and bushes.
- Use painter’s tape: Seal off windows, trim, light fixtures, and house numbers.
- Move furniture and outdoor decor: Keep things at least 10 feet away from the house.
- Lay ground protection: Especially if you’re painting multiple stories—paint can travel on windy days.
This setup not only saves you cleanup time, but it gives your professional painters the room they need to work efficiently.
5. What Homeowners Often Miss — Common Exterior Painting Mistakes to Avoid
Let’s be honest—we’ve all been tempted to cut corners. But when it comes to exterior painting, even small mistakes can be costly.
Avoid these painting pitfalls:
- Skipping prep work: Dirt, moisture, or old paint can destroy your new finish.
- Painting in the wrong weather: Intense sunlight, rain, or humidity can cause cracking and poor adhesion.
- Only applying one coat: For true durability and UV protection, you almost always need two coats.
- Using cheap or wrong paint: We recommend high-quality paint brands like Benjamin Moore or Sherwin Williams for their UV resistance and longevity.
- Not accounting for drying time: Rushing the process can ruin even the best paint job.
🚫 Cutting corners may save you a few dollars now, but it will cost you double in the long run.
6. Choosing a Professional Exterior Painter in Kirkland
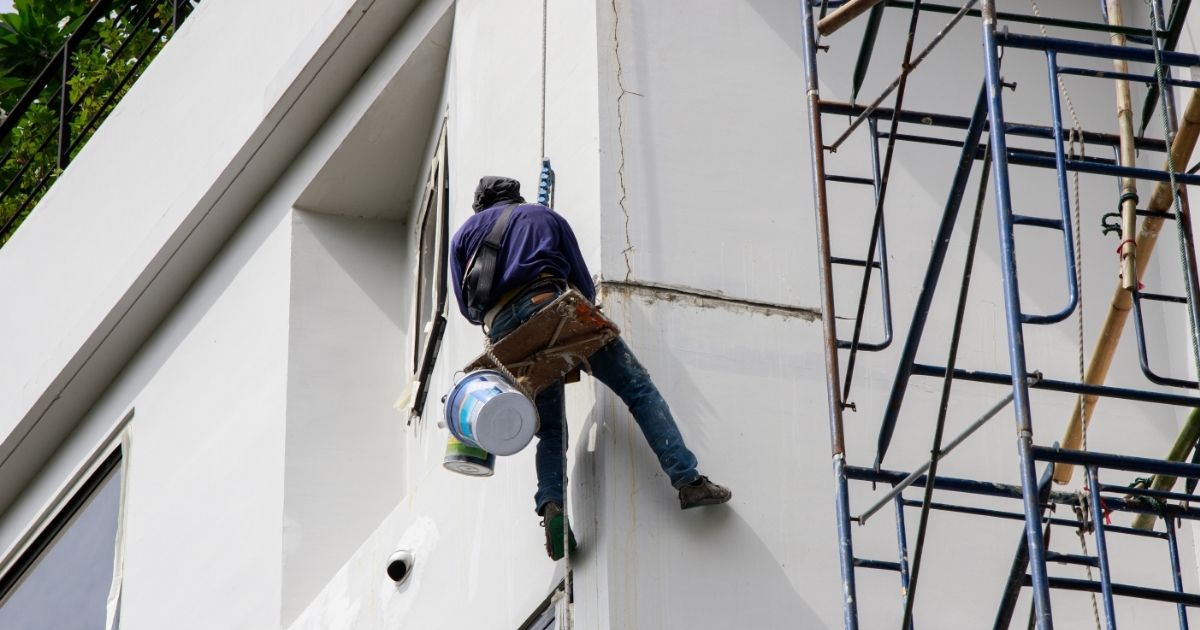
There’s nothing wrong with a DIY painting project, but if you want consistent, lasting results, working with an experienced exterior house painter can be a game changer.
Here’s what to look for:
- Licensed and insured painters with local references
- Experience with your siding type (wood, vinyl, aluminum, etc.)
- Transparent quotes that include labor costs, number of coats, and materials
- Use of proper safety equipment for multiple stories or steep roofs
- A clear process for extensive prep work, clean-up, and warranties
When you hire professionals, you’re not just getting paint—you’re getting peace of mind and a home that looks amazing for years.
7. When’s the Right Time to Start Painting?
Timing is everything—especially in Kirkland where rain can sneak up on us at any time.
Ideal exterior painting weather:
- Temperature: Between 50°F and 85°F
- Humidity: Below 70% if possible
- Sun exposure: Avoid painting in direct sunlight to prevent lap marks
- Forecast: Dry for at least 2 days after painting
Spring and early fall are usually the best times for painting, but each home’s exterior is different. If your house is shaded or prone to moisture, plan your schedule accordingly.
8. Final Touches: What to Expect During and After Painting
Once prep is complete, here’s what a smooth project should look like:
What happens during painting:
- Cutting in edges: This creates crisp lines around windows and trim.
- Rolling or spraying: Depending on your siding and texture, your exterior painter may use a roller or sprayer.
- Second coat: Applied after the first coat fully dries for better coverage and color richness.
- Final walkthrough: Inspect for touch-ups and ensure everything is cleaned and restored.
After painting:
- Avoid touching or cleaning the surface for at least a week.
- Schedule periodic maintenance to keep your home’s curb appeal fresh.
- Keep leftover paint for future touch-ups.
A fresh coat of paint can transform your home—but only if the prep is done right.
Ready to Paint? Let’s Do It the Right Way
At Elevate Structures, we believe in doing things once—and doing them right. If you’re planning an exterior painting project in Kirkland, we’d love to help you get the best results from day one.
Whether you’re still deciding on colors or already eyeing that peeling paint, our team of skilled, local exterior painters is here to guide you through every step. From pressure washing and prep to that beautiful final coat, we’re with you the whole way.
👇 Let's take the first step together:
✅ Book a free inspection
✅ Get a no-obligation quote
✅ Ask us anything about the process
Because your house deserves more than just paint—it deserves lasting care.
FAQ
1. How do I prepare the exterior of my house for painting?
To prepare your home's exterior for painting, clean the surface thoroughly, repair any damage, sand rough areas, and prime bare wood or patched spots.
This prep work ensures a smooth, long-lasting exterior paint job by helping the paint adhere better and resist peeling or flaking. Don’t forget to protect landscaping and tape off windows before starting.
2. What should you not do before painting a house exterior?
Avoid painting on dirty, wet, or damaged surfaces, skipping primer on bare wood, or painting in extreme weather conditions.
Each of these mistakes can lead to a failed painting project, causing bubbling, peeling paint, or premature fading. Always allow surfaces to dry completely after cleaning, and paint only when the weather is dry and mild.
3. What is the best way to clean a house before painting?
The best way to clean your house before exterior painting is to pressure wash the surface to remove dirt, mildew, and loose paint.
If pressure washing isn’t an option, scrubbing with a soft-bristle brush and exterior-grade detergent also works. Let the siding dry completely—especially wood siding or vinyl siding—before moving to the next step.
4. Do I need to sand the house before painting?
Yes, sanding is essential if there’s loose paint, rough patches, or transitions between old and new surfaces.
Sanding helps smooth the surface and allows the new exterior house painting to adhere evenly. It’s especially important around patched areas or where peeling paint has been removed.
5. What happens if you don't wash a house before painting?
If you skip washing, the paint may not adhere properly, leading to early failure such as cracking, blistering, or peeling.
Dirt, chalk, mildew, and oils on your home's exterior create a barrier that prevents high quality paint from bonding. Always clean the surface thoroughly before painting—even for professional painters.
6. What is the best temperature to paint the outside of a house?
The ideal temperature for exterior painting is between 50°F and 85°F, with low humidity and no rain in the forecast for at least 24–48 hours.
Avoid painting in direct sunlight or during extreme weather conditions—this can cause issues like lap marks, poor drying, or uneven color coverage.
7. How long should I wait to paint after pressure washing the house?
Wait at least 24 to 48 hours after pressure washing before painting your house, depending on the weather and surface material.
Surfaces like wood siding or areas in the shade may take longer to dry. Painting too soon traps moisture under the new paint, which can lead to bubbling or mold.
8. Do professional painters clean the walls before painting?
Yes, reputable exterior painters include cleaning in their prep process—usually pressure washing or scrubbing—to ensure proper paint adhesion.
Cleaning is often part of their extensive prep work, along with sanding, priming, and taping off areas. If you’re hiring a professional painting crew, confirm that this step is included in your quote.
9. Should I caulk before or after painting exterior?
You should caulk exterior cracks and gaps before painting, after the surface has been cleaned and dried.
Use paintable, exterior-grade caulk to seal gaps around windows, trim, and siding joints. This step prevents water intrusion and ensures a clean, polished finish for your exterior house painting project.

%201.png)

.png)


.svg)
